Author Archives: admin

Pano Planet

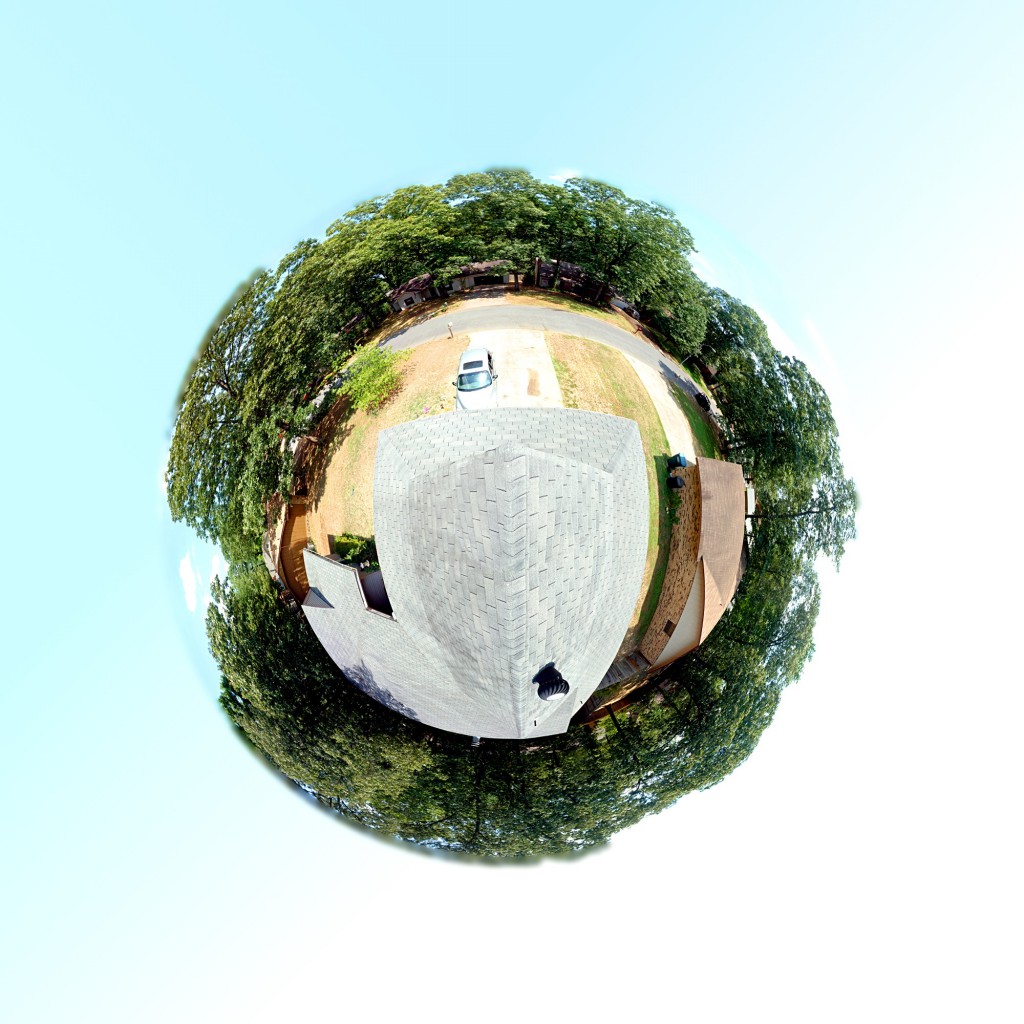
Here’s a neat photo trick I’ve seen recently, and decided to give it a shot myself.  The general idea is to take a 360 degree panorama shot, then map it to polar coordinates.  This produces a sort of weird spherical projection that looks like a tiny planet.  Called “Pano Planets” or “Wee Planets” (or various other names), the effect is striking.  Objects on the horizon pop out into space, while things in the foreground are flattened.

The neighbors must have thought I was pretty crazy spinning a tripod around on our roof, but I made one from the view at our house.

iNES Header Fixer

Auditing ROM collections has been made much simpler over the years thanks to concerted efforts of many cartridge purchasers, dumpers, cataloguers, and coders.  Using a combination of RomCenter (or ClrMamePro) and a No-Intro .Dat file, one can quickly fix an entire collection in one go: repairing names, verifying regions, checking for problem ROMs, producing have-lists, etc etc.

NES roms throw a particular curveball because they carry a 16-byte header with a little info about the board within the cart.  Emulators need this info, but it isn’t verified by No-Intro since it’s not part of any real dump.  As a result iNES headers remain missing, incorrect, or filled with crap data.  A new repair tool is needed.

ines-fix.py is a Python script which can repair defunct iNES headers using an external cart database.  It does this by extracting the data portion from the file, calculating a crc32, looking for the crc the xml file, and then rebuilding a header based on that info.  If the old and new headers differ, the file is overwritten with a fixed version.

Be careful with this tool: it’s sort of a blunt object, and may trash your rom collection if not used carefully.  Make backups.  In particular it writes only iNES v1 headers, expecting emulators to cope with the shortcomings of this format.

Output samples:
-> No change to existing header

CRC check: 4318A2F8
Found CRC match: Barker Bill's Trick Shooting
*** Header unchanged: not writing replacement file.
----------------------------------------------------

-> Adding a battery

CRC check: 1F6EA423
Found CRC match: Baseball Simulator 1.000
*** HEADER UPDATED ***
oldHeader: 4e45531a081010000000000000000000
newHeader: 4e45531a081012000000000000000000
All done.  Wrote new file roms/Baseball Simulator 1.000 (USA).nes

-> Correcting a mapper, vertical mirroring, and removing “DiskDude!”

CRC check: 9BDE3267
Found CRC match: Adventures of Dino Riki
*** HEADER UPDATED ***
oldHeader: 4e45531a0204004469736b4475646521
newHeader: 4e45531a020431000000000000000000
All done.  Wrote new file roms/Adventures of Dino Riki (USA).nes
----------------------------------------------------

-> Standardizing on “horizontal mirroring”

CRC check: 3ECA3DDA
Found CRC match: Bases Loaded 3, Ryne Sandberg Plays
*** HEADER UPDATED ***
oldHeader: 4e45531a101041000000000000000000
newHeader: 4e45531a101040000000000000000000
All done.  Wrote new file roms/Bases Loaded 3 (USA).nes
----------------------------------------------------

-> Adding a missing header

CRC check: 50CCC8ED
Found CRC match: Battleship
*** HEADER UPDATED ***
oldHeader:
newHeader: 4e45531a020430000000000000000000
All done.  Wrote new file roms/Battleship (USA).nes
----------------------------------------------------

Here’s the script:

Continue reading

DIY Photographic Solar Filter

There’s a solar eclipse coming up tomorrow night. But don’t think you can just grab your camera before the event and go: getting usable sun photos requires preparation, and most importantly a solar filter. Direct sunlight is way too bright for cameras to cope with – they simply can’t stop down far enough, nor shoot fast enough, to keep from blowing out the image and producing a huge featureless white blob.

A solar filter sits between your lens and the sun, and it knocks down the light to 1/10000 or so of its original amount – something a camera can then deal with.  If you’ve planned ahead far enough you may already have a solar filter. If not, you can improvise something like this one for $3. (If you’d rather read this as an Instructable, click here: https://www.instructables.com/3-Camera-usable-Solar-Filter/)

DO NOT LOOK THROUGH THIS FILTER AT THE SUN.  YOU COULD EASILY BLIND YOURSELF.

I can’t stress the previous lines enough.  This design is safe for cameras, not for eyes, because it blocks visible light.  That leaves the harmful UV and infra-red rays unblocked – things your camera is not sensitive to, but your retinas are!  If you want a visual (observing) filter, buy one.  No DIY solution can be tested / guaranteed as a commercial one can.

Okay, let’s get started.  Filter construction is simple: you need a filter material, and a housing to fit it onto the camera.

Parts list:

  • Empty plastic food container (with lid), larger than lens
  • Mylar sheet.  Buy an “emergency blanket” from the camping supplies section at Wal-Mart.  Total cost: $2.97
  • Razor blade
  • Black spray-paint

Step 1: Cut a hole in the narrow end of the plastic container.  This end will fit over your lens.  Aim for a snug fit, so it doesn’t fall off your camera, but don’t go too snug so you have to force it on (could damage the drive motor)

Step 2: Spray paint the cup black, inside and out.  This helps block light from leaking in through the white sides.

Step 3: Cut a large hole in the lid, leaving behind a ring.  Leave a couple millimeters on the edge so it’ll remain stable.  Then, lay the ring on the mylar sheet, and cut two or three squares of Mylar larger than the ring.

Step 4: Assemble your new filter!  (Note I painted and assembled in the wrong order) Now simply stuff it over the end, point at the sun (tripod preferred), and shoot.  Your camera might get confused about the target – set it for “spot meter” and manual focus at infinity.

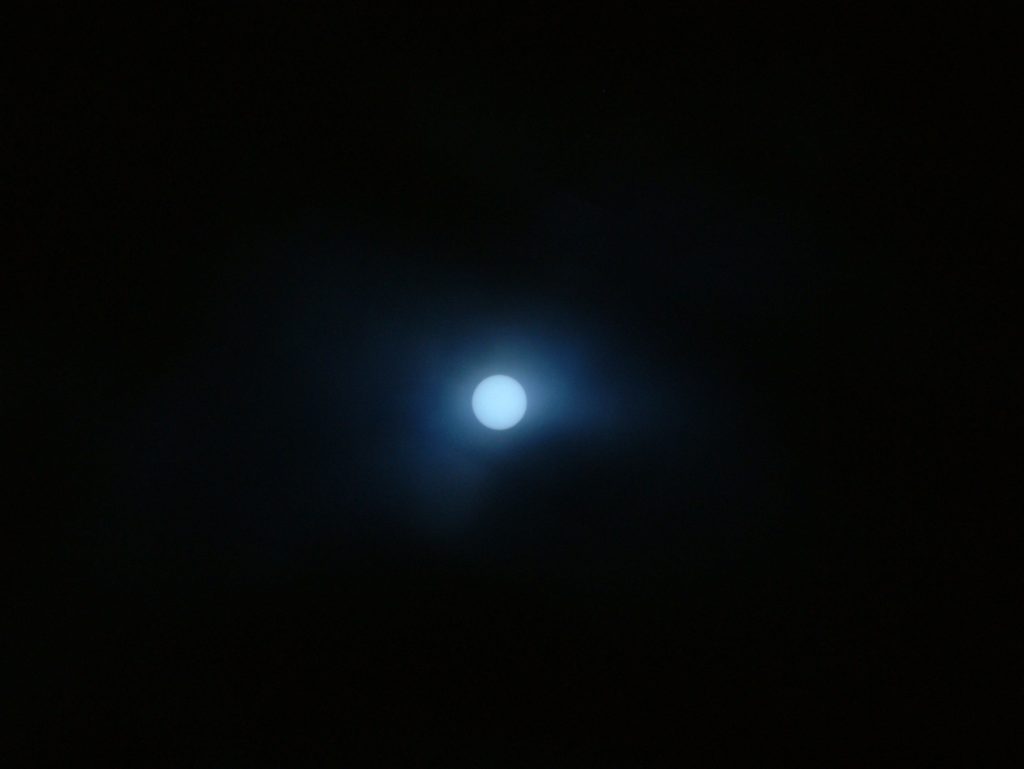
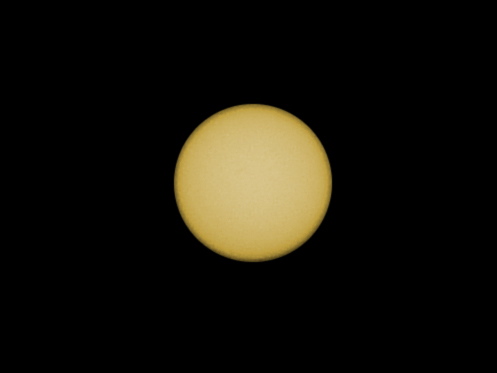
Here’s a first attempt using the filter.  There’s some haze here that was added by the filter: I can’t figure out how to get rid of it.  Guess that’s just the nature of the tool.  Try varying the number of filter elements (sheets) to see if you get better results.  Make sure to get in lots of practice today and tomorrow – you don’t want to be fiddling with this during the minute or so that the eclipse is actually going on!

EDIT: 2 sheets, f11, 1/1300 exposure.  Post: Crop.  Manually selected circular sun and blacked background / haze.  Colorize.

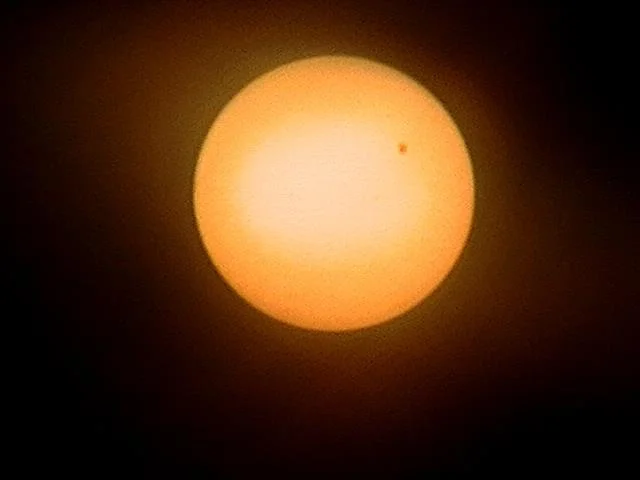
Finally, here’s an image I got of the Transit of Venus on June 5, 2012. This used a filter over a video camera, zoomed in 40x.

Timewave v1.2

Introduction
Timewave is a 2-d space shooter written in C++ using some of the freely available SDL libraries. It runs on Windows, Linux, and Mac OSX (10.4 or later). The object of this game is to fight through the mass of enemies in each level, defeat the level boss, and finally destroy the (well-armed) enemy space station far from Earth.

It has an interesting “twist” in which you can alter the flow of time. Build up your time meter by playing the game in fast-forward. Playing in slow motion affords you some extra maneuvering room but depletes the meter. If you achieve a high score, you can choose a color flag to represent your ship and have yourself recorded on the high score table.

This game is ‘freeware’ – you can download it and copy it around to anyone you like, you can even alter the graphics to better suit your tastes if you wish, but don’t pull my name off it and try to pass it off as your own work. You can’t get the source code though because it’s a total wreck. I may go and try cleaning it up later for a release, but until then, the binaries in the download should work just fine.

Screenshots
Last updated Aug. 7, 2007 – click for full-size

Recent Changelog

  • Reduction in resource file sizes: some items converted to 256-color, optipng and audio editing shaved further bytes.
  • Renamed hiscore.dat to config.ini, and added more options.
  • New command line options: -f (switch to Fullscreen mode), -c (Create Config: just write config.ini and exit), -w (switch to Windowed mode)
  • Added a “Change Keys” button which allows users to alter the inputs.
  • Added “Arcade Mode” switch to the config.ini file. This causes the game to simulate an arcade machine on Free Play: the title screen rotates with the high score table.
  • The arrow keys now drive the cursor on the high score color picker table.
  • Mac OSX port (PPC / Intel Universal Binary, 10.4 or greater).

Downloads
Last updated May 3, 2012

TI-83 Software

One Christmas in high school, I got a TI-GraphLink, allowing me to connect my TI-83 to my computer and transfer files between them. This was a great tool: now I could save my programs to the PC and no longer be at the mercy of memory resets from battery failure or an upcoming math test.

It also let me try out some Z80 programming, but I didn’t ever get too far with that. Hard-locking the calculator and forcing a battery pull was just too much of a hassle. I followed tutorials and had plans and sample code, but never pulled off a complete program.

All I have left now is just a handful of TI-83 BASIC programs. Sadly my GoldenEye 007 port is gone. I did find a couple of sprite pages for a work-in-progress “North and South” and “Smash Bros.” conversion, both would have been written in assembly and played over the link cable.

There is still “Fruity Vegas Slots”, my most polished game (a slot machine simulator). Also found Hearts (which used cards 2-14 instead of 2-10, J, Q, K, A), Bombs Away (clone of the Palm Pilot game “City Bomber”), a quadratic formula, and my own version of the classic “RACE”.

I deleted a couple of stupid inside-joke type programs and some WIP stuff. Nobody wants to see that : )

I have a lot of fond memories of working on this platform. The slow execution speed and laggy LCD screen reminded me a lot of working on other 8-bit systems, except this one was a handheld and had a wide user base of “everybody in school”. Built-in BASIC is such an endearing feature that I am surprised modern OSes don’t include something like it: QBasic and HyperCard, for instance, were both greatly loved and yet they’re both dead software.

Click here to download the complete package: ti83.tar.gz [2.88 KB]