There’s a solar eclipse coming up tomorrow night. But don’t think you can just grab your camera before the event and go: getting usable sun photos requires preparation, and most importantly a solar filter. Direct sunlight is way too bright for cameras to cope with – they simply can’t stop down far enough, nor shoot fast enough, to keep from blowing out the image and producing a huge featureless white blob.
A solar filter sits between your lens and the sun, and it knocks down the light to 1/10000 or so of its original amount – something a camera can then deal with. If you’ve planned ahead far enough you may already have a solar filter. If not, you can improvise something like this one for $3. (If you’d rather read this as an Instructable, click here: https://www.instructables.com/3-Camera-usable-Solar-Filter/)
DO NOT LOOK THROUGH THIS FILTER AT THE SUN. YOU COULD EASILY BLIND YOURSELF.
I can’t stress the previous lines enough. This design is safe for cameras, not for eyes, because it blocks visible light. That leaves the harmful UV and infra-red rays unblocked – things your camera is not sensitive to, but your retinas are! If you want a visual (observing) filter, buy one. No DIY solution can be tested / guaranteed as a commercial one can.
Okay, let’s get started. Filter construction is simple: you need a filter material, and a housing to fit it onto the camera.
Parts list:
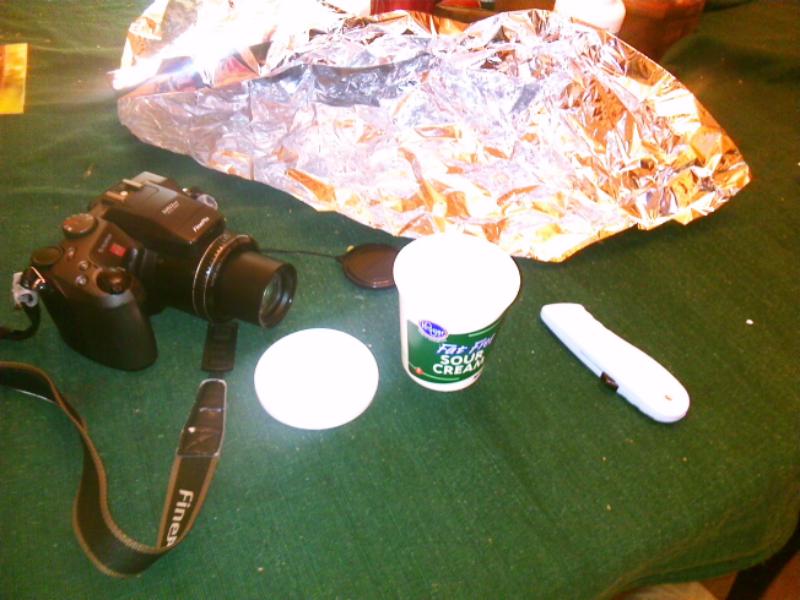
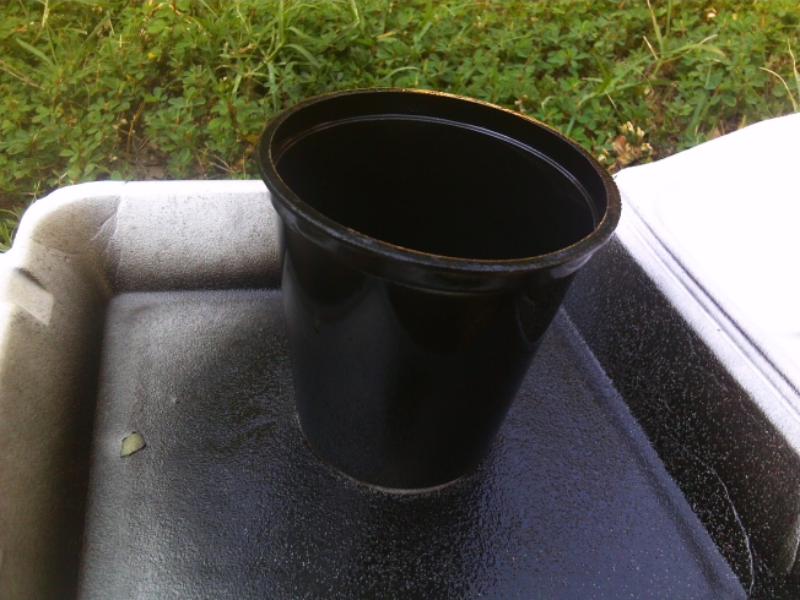
- Empty plastic food container (with lid), larger than lens
- Mylar sheet. Buy an “emergency blanket” from the camping supplies section at Wal-Mart. Total cost: $2.97
- Razor blade
- Black spray-paint
Step 1: Cut a hole in the narrow end of the plastic container. This end will fit over your lens. Aim for a snug fit, so it doesn’t fall off your camera, but don’t go too snug so you have to force it on (could damage the drive motor)
Step 2: Spray paint the cup black, inside and out. This helps block light from leaking in through the white sides.
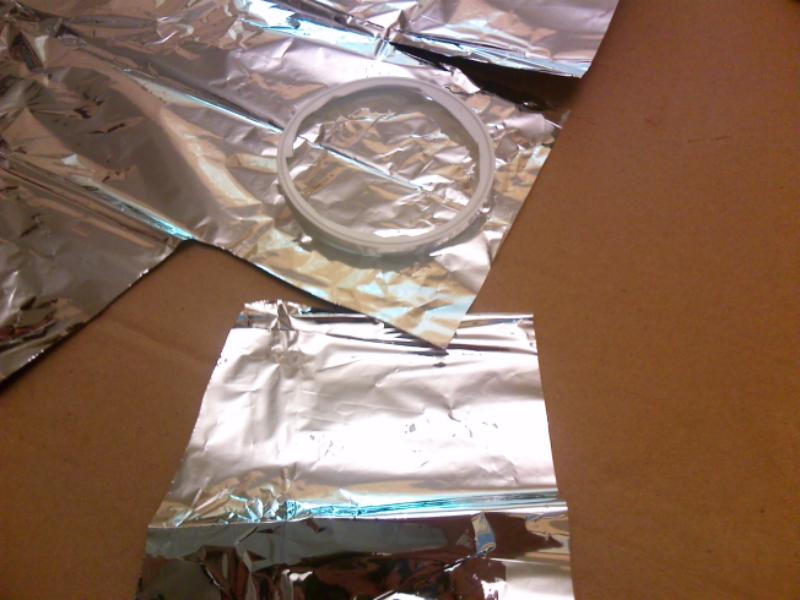
Step 3: Cut a large hole in the lid, leaving behind a ring. Leave a couple millimeters on the edge so it’ll remain stable. Then, lay the ring on the mylar sheet, and cut two or three squares of Mylar larger than the ring.
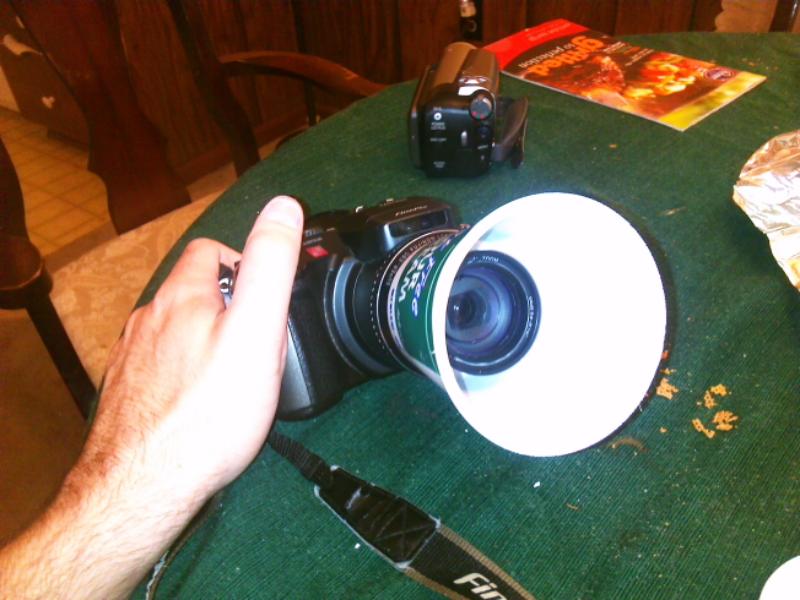
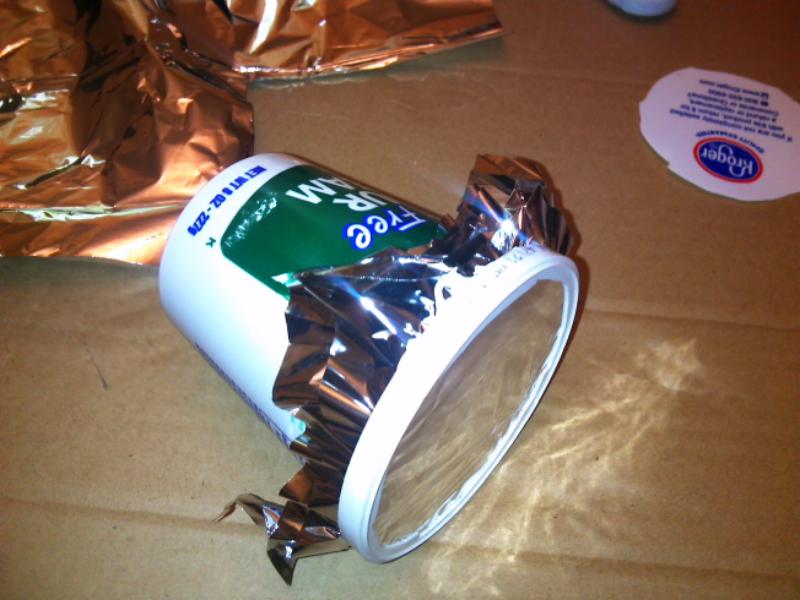
Step 4: Assemble your new filter! (Note I painted and assembled in the wrong order) Now simply stuff it over the end, point at the sun (tripod preferred), and shoot. Your camera might get confused about the target – set it for “spot meter” and manual focus at infinity.
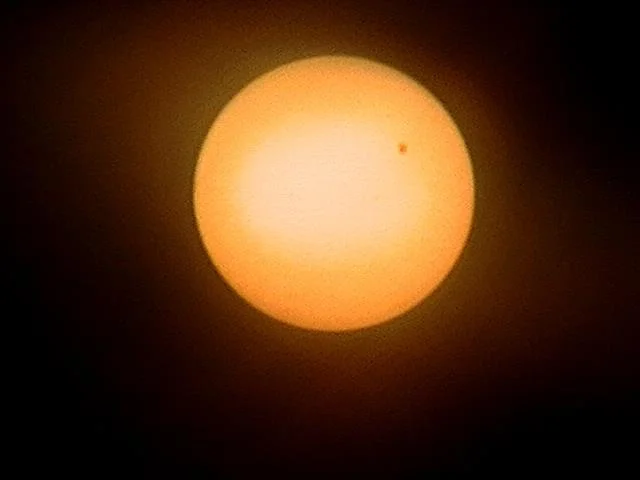
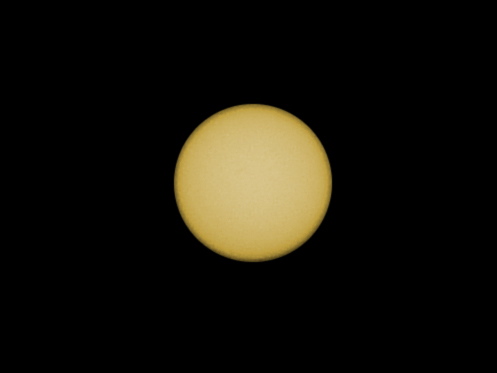
Here’s a first attempt using the filter. There’s some haze here that was added by the filter: I can’t figure out how to get rid of it. Guess that’s just the nature of the tool. Try varying the number of filter elements (sheets) to see if you get better results. Make sure to get in lots of practice today and tomorrow – you don’t want to be fiddling with this during the minute or so that the eclipse is actually going on!
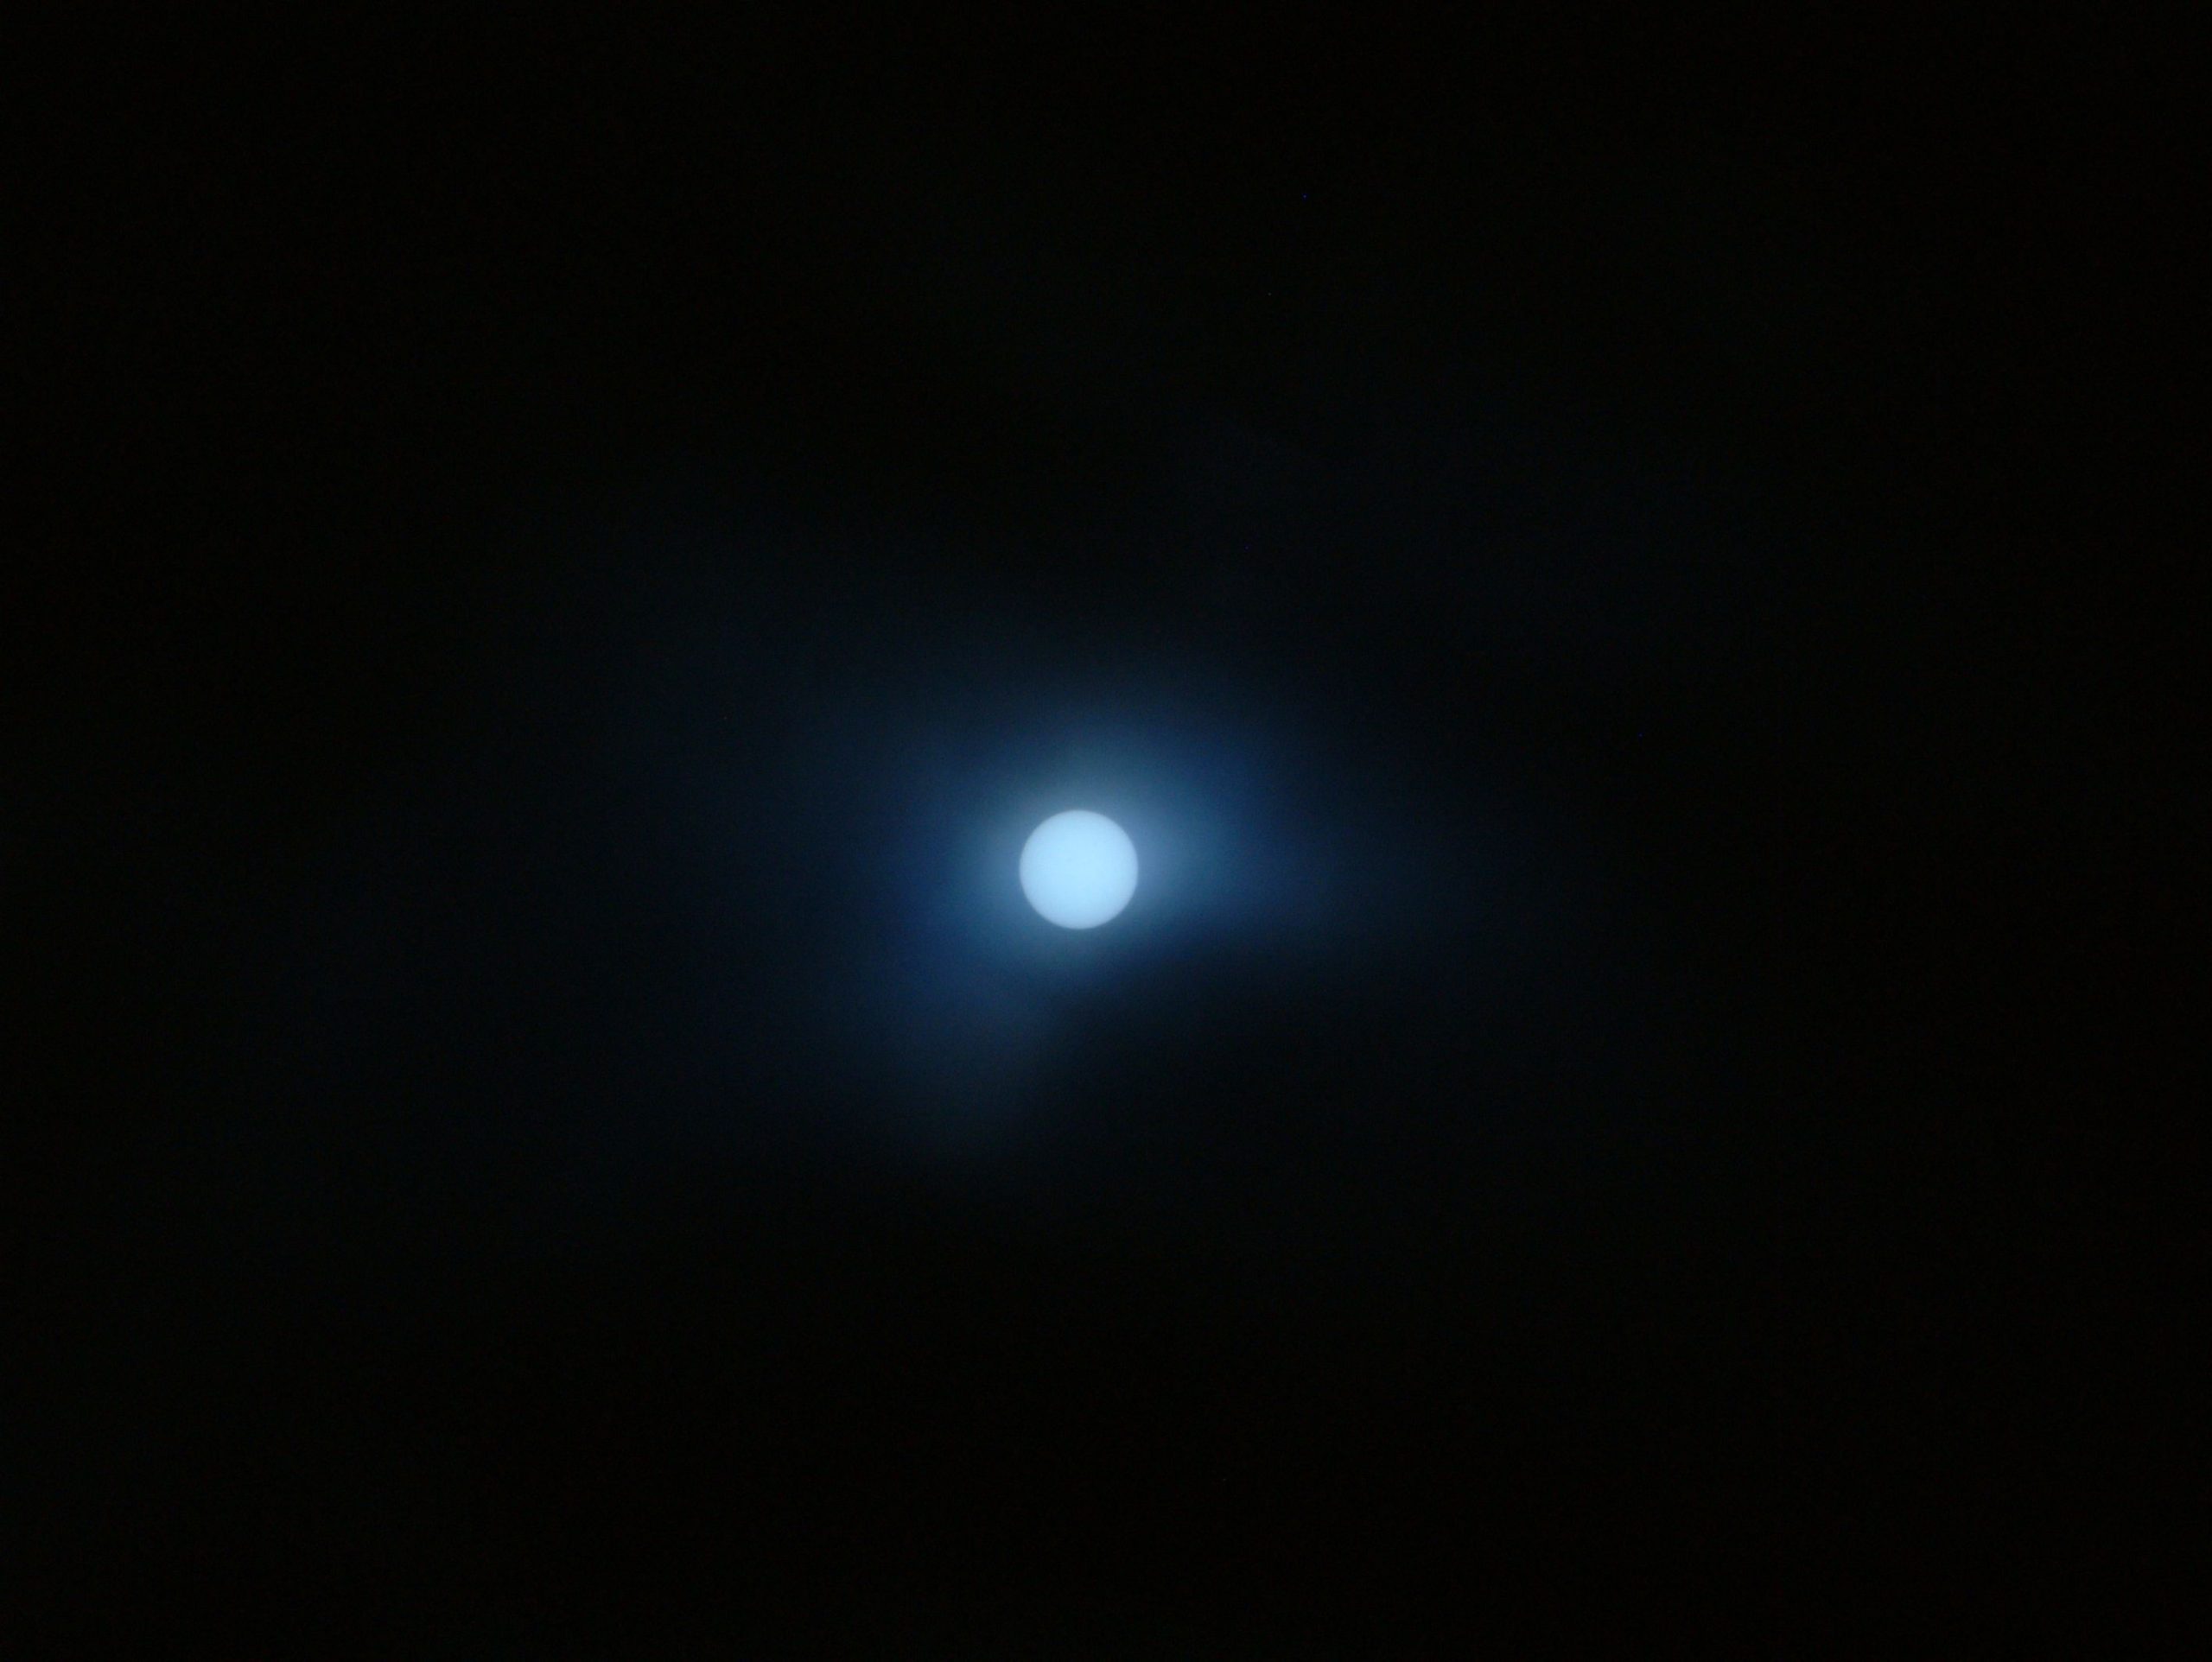
EDIT: 2 sheets, f11, 1/1300 exposure. Post: Crop. Manually selected circular sun and blacked background / haze. Colorize.
Finally, here’s an image I got of the Transit of Venus on June 5, 2012. This used a filter over a video camera, zoomed in 40x.