Duplicate Image Finder (in Perl)

I have duplicate photos in my image library.  We all do.  I want to weed them out.  The trouble with using straight md5 for this, though, is that EXIF data on JPEG files may be altered by my photo management tool – thus they contain the exact same photo data, but the associated extra data (date/time, ICC profile, tags, etc) causes pure checksum comparison to fail.

Here’s a Perl script which iterates through a folder list and sends all files off for md5 digest.  However, any jp(e)g files are first run through jpegtran and saved as a temporary file, so they can be “normalized” (i.e. convert to optimized, progressive, and EXIF-stripped) so the md5 is performed on just image data.  This should find duplicates regardless of image program tampering.

#!/usr/bin/perl -w
use strict;

# path to jpegtran
my $JPEGTRAN_LOC = '/Users/grkenn/Pictures/jpegtran';

# Somewhat Advanced Photo Dupe Finder
# Greg Kennedy 2012

# Identifies duplicate photos by image data:
# strips EXIF info and converts to optimize + progressive
# before performing MD5 on image data

# Requires "jpegtran" application from libjpeg project
# Mac users: http://www.phpied.com/installing-jpegtran-mac-unix-linux/

use File::Find;
use Digest::MD5;

my %fingerprint;

my $ctx = Digest::MD5->new;

sub process
{
  my $filename = $_;

  # file is a directory
  if (-d $filename) { return; }
  # file is an OSX hidden resource fork
  if ($filename =~ m/^\._/) { return; }

  if ($filename =~ m/\.jpe?g$/i) {
    # attempt to use jpegtran to "normalize" jpg files
    if (system("$JPEGTRAN_LOC -copy none -optimize -progressive -outfile /tmp/find_dupe.jpg \"$filename\"")) {
      print STDERR "\tError normalizing file " . $File::Find::name . "\n\n";
    } else {
      $filename = '/tmp/find_dupe.jpg';
    }
  }

  # open file
  open (FP, $filename) or die "Couldn't open $filename (source " . $File::Find::name . "): $!\n";
  binmode(FP);
  # MD5 digest on file
  $ctx->addfile(*FP);
  push (@{$fingerprint{$ctx->digest}}, $File::Find::name);
  close(FP);
}

## Main script
if (scalar @ARGV == 0)
{
  print "Usage: ./find_dupe.pl [ ...]\n";
  print "\tjpegtran MUST be in the path,\n";
  print "\tor edit the script and set JPEGTRAN_LOC to an absolute location\n";
  exit;
}

find(\&process, @ARGV);

print "Duplicates report:\n";

foreach my $md5sum (keys %fingerprint)
{
  if (scalar @{$fingerprint{$md5sum}} > 1)
  {
    print "--------------------\n";
    foreach my $fname (@{$fingerprint{$md5sum}})
    {
      print $fname . "\n";
    }
  }
}

The output looks something like this:

macmini:Pictures grkenn$ ./find_dupe.pl test_lib/
Duplicates report:
--------------------
test_lib/ufo or moon.jpg
test_lib/subdirectory/dupe_7.jpg
--------------------
test_lib/too cool jenny.jpg
test_lib/subdirectory/dupe1.jpg
test_lib/subdirectory/dupe2.jpg

Atari Flashback 2 Mod

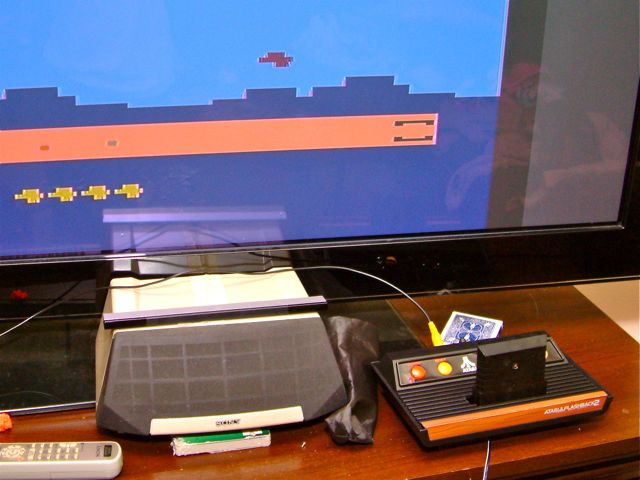
The Atari Flashback 2 is a really neat plug-and-play TV game system. It looks like a tiny Atari 2600 and plays 20+ classics for the system. Most interesting to hackers, however, is that the board inside isn’t just a 2600 emulator or recreation – it’s actually a modern, miniaturized 2600-on-a-chip playing real ROM images. Additionally, there is a convenient silkscreened table on the board showing pinouts for adding a 2600 cartridge connector and playing real VCS game cartridges on the system.  Compatibility isn’t 100%, but it’s quite accurate, and the A/V cable is a nice way to hook up to a modern TV (no more fiddling with RF adapters).

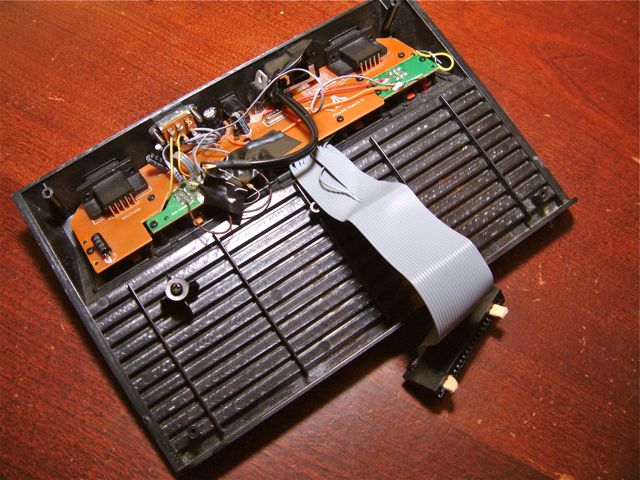
Finding a NOS cart connector is tough, but there’s an alternative: source a floppy-to-IDE cable from an old PC – the board connector has the same pin spacing as a cart.  I stuffed cut-down popsicle sticks into the gaps on either side (the connector is wider than a real 2600 cart).

Soldering to the board can be a real pain in the butt, especially if (like me) you don’t have a solder station to do it and are using a blunted Rat Shack iron for the job.  Miraculously, it all worked when I screwed it back together.  Besides the cartridge slot itself I added a few details:

  • Power light
  • Difficulty lights
  • Switch on back to select between “cart” and “built-in games”
  • Removed hardwired A/V cable and replaced with A/V jacks

Cutting the slot posed a new challenge, which I didn’t do a very good job of.  I drilled holes through the cart connector and used long bolts to secure it to the back of the system – carefully spaced so that the would slide into the tabs on the Atari cartridges and release the dust cover.  Then came time to cut a rectangular hole in the top.  I did this… and found I’d put it at the wrong spot.  So I had to cut another hole, leaving a gap around the cartridge and screwing the aesthetic.  This time I got it right and was able to play Star Wars: Empire Strikes Back on my big-screen TV.

Definitely not the most impressive Flashback 2 hack out there, but I’m pleased with the outcome.  Like most of my projects, this one dragged on for a couple of years before reaching a finished state – I’d throw a couple hours at it every few months but never seemed to get it wrapped up.  Now if I could just finish the multicart I’ve also been designing, I could have something to play on it.

Mac Mini Processor Upgrade

Our Mac Mini (Intel, late 2006) is now the family computer.  That’s a big job for this little machine, which last saw an upgrade in 2008 to 2gb RAM.  However, it still poked along on the Core Solo 1.5ghz processor that it shipped with.  That was decent in 2006 but it’s slow in 2012: when your Flash games look like a slideshow, it’s time to upgrade.

Fortunately, the top end processor for this machine (Core2Duo 2.33ghz, the “T7600” model) has been out of production for some time and prices have finally fallen below $100 shipped on eBay.  I snagged one for $91 and went through with the install today.  It’s a little nerve-wracking working in such a tight space, especially since you must pry the case apart using a putty knife.  Also, I had no thermal compound… the nice guys at Luyet Computers donated the .1 gram or so that I needed at no charge (thanks!) and I was up and running shortly.  I also blew out a ton of dust and cleaned up some stickiness that appeared to be ancient Sprite spilled on the computer.

End result: well, it’s way way faster, as to be expected.  I didn’t measure temperatures before and after but (thanks to eliminating dust) it’s actually running quieter than when I took it apart.  For fun I did a before-after Geekbench scores comparison.  Click here to see the Google Docs spreadsheet.

If you have a Mac Mini, I highly highly recommend this upgrade, it’s great for the price (or you can probably do even better getting the T7200 or T7400 versions… but I was enticed by the turbo clock speed).  We should be good for the foreseeable future, until the HDD dies and I put in an SSD instead : )